Walk Cycles are made of 5 key positions which make up one step. This diagram form Richard William's book 'The Animator's Survival Kit' showing the five key position in an average walk cycle of one step.
The first and last position are the contacted positions where both legs are fully extended with a slight bend in the knee. The next positions the down, knees are both bent and the body is in its lowest position. this and the up position give the walk more weight and a slight bobbing motion.

Ball and Legs Tutorial:
Contact and Passing Positions:
The first stages of animating a walk cycle is to set key poses. The first key poses set are the contact poses on frames 1 and 25 (the poses are the same) and frame 13 (which is the same pose as frames 1 and 25 but inverted). Next are the passing positions which happen half way through each step at frames 7 and 19.

When aniamting this rig I set my prefernces to Stepped instead of linear. This way when playing back the animation only the key frames where shown. The video bellow shows the 5 keyed positions in the image above.
Contact and Passing Positions:
All 5 Key Positions
After adding the contact and passing positions the next poses added where the down and up positions. These positions help add weight and gives the walk a bobbing up and down motion. Also when creating these poses I added rotation to the ball as fell as lifting it to make the ball look like it's shifting it's weight forward with it's legs.

The video bellow shows the animation with the 9 keyed positions shown in the image above again in the Stepped setting.
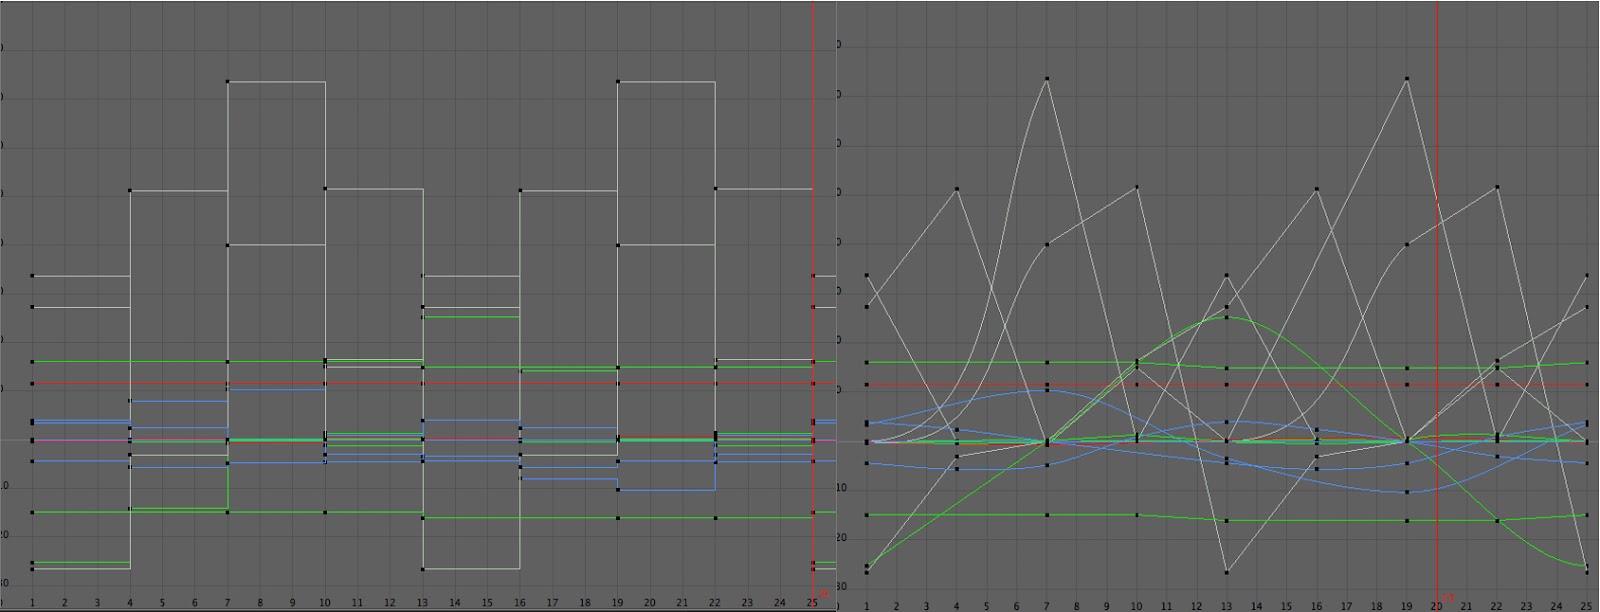
Graph Editor:
Once the key frames are established the animation is cleaned up using the graph editor. The graph editor on the left is in the Stepped preferences and the on on the right is in linear. Here I learnt to flatten or straighten tangents and where to delete unnecessary keyframes to create smooth tangents. I found this part of the tutorial really beneficial as it taught me more efficient ways of using the graph editor and how the tangents an be manipulated.
Ball and Legs finished Walk Cycle:
I found this tutorial really useful in understanding the key poses for the legs in a walk cycle and also drew my attention to the importance to the position of the feet. Using the graph editor was particularly useful in making the feet stick and achieving a smooth banking side to side motion. What I would like to do next with this rig is to play around with the walk to give it different rhythms and personality as well as experiment with the squash and stretch deformer.
No comments:
Post a Comment